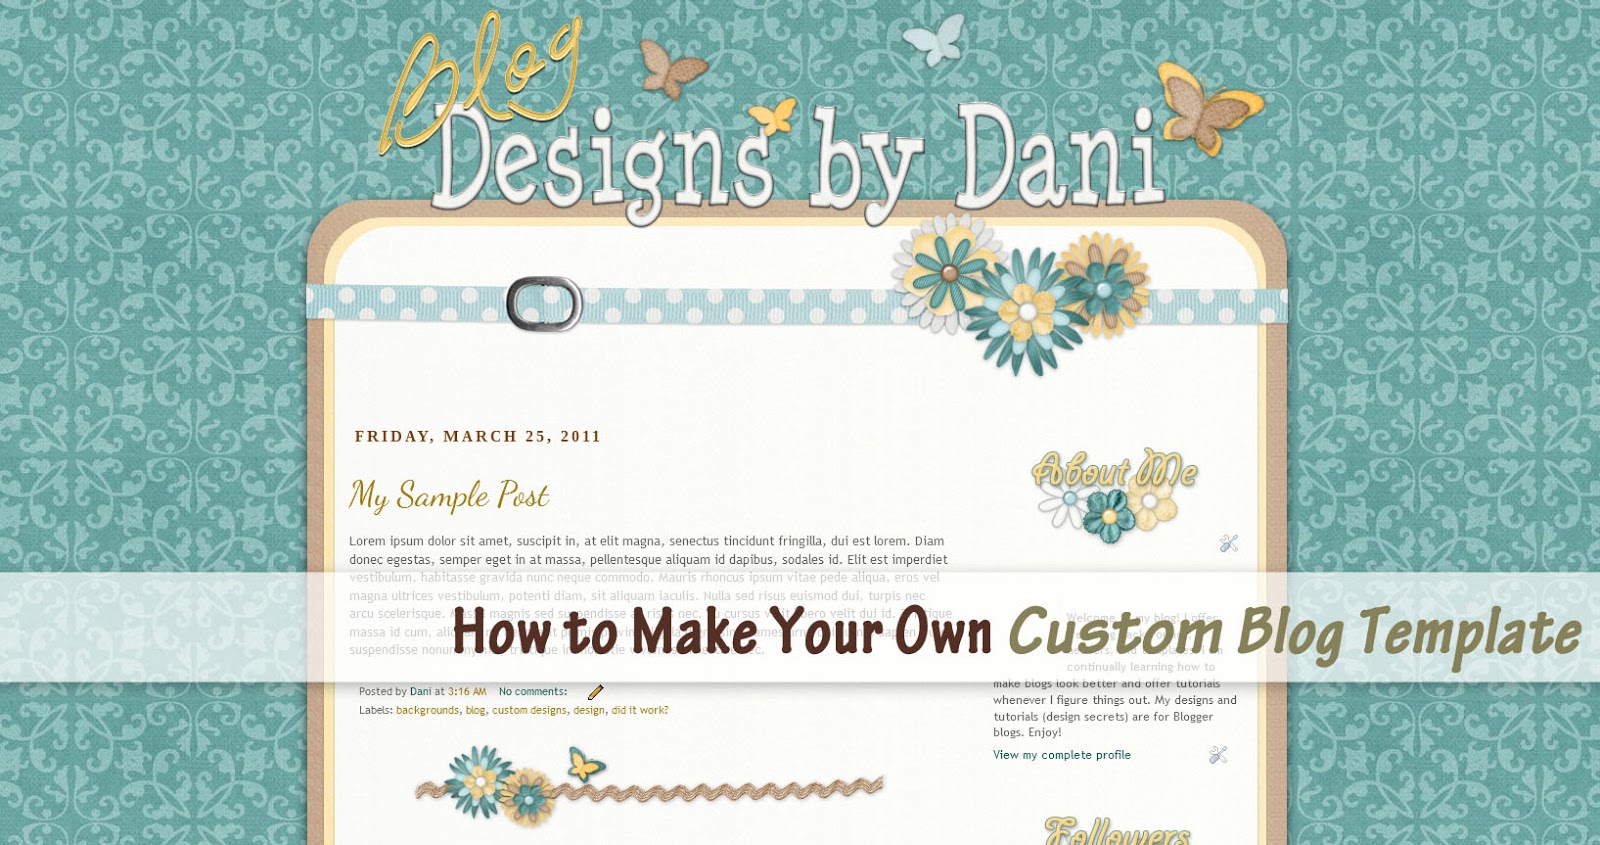
I have finally finished my tutorial on How to Create Your Own Custom Blog Template! (or at least customize the Simple Template with your own amazing design) This tutorial is based on the designs that I like to make where the header is placed above the body of the blog in such a way that it looks like it has been cut away from the background as shown below:

This tutorial is my most advanced tutorial in terms of both graphic design skills and HTML/CSS knowledge and is quite long. However, if you have had success with my previous tutorials, don't be afraid to give this one a try!
To create the graphics for your template, you can use any of your own creations or obtain permission from designers that make digital clipart or any other digital designs. I like to use digital scrapbook kits. In my sidebar are listed the digital designers that I have used for my free designs. I have permission to use their designs because I have paid the commercial license fees they required. If you find a design on the web, make sure that you check the designer's terms of use and/or email the designer to verify their permission for you to use their designs. This is especially true if you have a commercial blog and/or make any income from your blog.
Once you have graphics for your template design, you need to decide what graphics editing program you will use. I recommend either Photoshop Elements or Pixlr.com. If you are fine with a simple design, Pixlr is the way to go. If you want something more detailed, I would use something better like Photoshop Elements.
Now, let me give you a quick break down of the steps in this tutorial:
1. BACKUP YOUR CURRENT TEMPLATE!
2. Create a Repeatable Background
3. Create a Header, Post/Sidebar Background and Footer
4. Change to the Simple Template
5. Alter the HTML/CSS
6. Make a Few Adjustments
7. Add Extra Designs
Alright, let's get started:
1. BACKUP YOUR CURRENT TEMPLATE!
This tutorial can get complicated. If you make any mistakes, I am not liable, so backup your template before you do anything to your blog. Another good idea is to create an additional blog that you can practice on. That way, if anything goes wrong, your practice blog will be affected but your real blog won't be ruined. Once you create your perfect template, you can download the HTML from the practice blog and then upload it to the blog you actually use.
Here is my tutorial on How to Backup Your Template. Be sure to read the full tutorial so that you backup both your template and your sidebar gadgets.
2. CREATE A REPEATABLE BACKGROUND
This is an example of a repeatable background that I will be using for this tutorial.

To make this design, I cropped an image from a digital scrapbook kit. (This is from Just So Scrappy's kit "Fresh Squeezed" by Katie Castillo). This image will be tiled across the background of your blog so that it covers the entire screen. This type of background is best because the file size of this image can be very small. A small image size means that when a reader opens your blog, the background of your design will load very quickly. More intricate background designs can get very large and slow down the computers of your readers.
This type of background is essential for this template design but you have 2 options for how to upload your background. I recommend following step A below to get more detailed instructions on making the background design. However, I recommend following the instructions in step B to upload your design straight from your computer.
A. Here is my tutorial on How To Make Your Own Background, that shows you how to make the background as well as how to upload it to the web onto a site like Photobucket.
B. If you don't want to host your background image on the web, you can upload it to your blog straight from your computer.
i. Go to your Template page.
ii. Click "Customize" (the orange button) so that you are in the Template Designer.
iii. Click "Backgrounds" from the menu on the left.
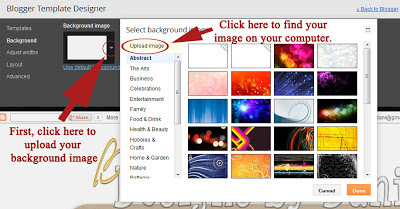
iv. Click the small gray arrow and then click "Upload Image" in the window that pops up.
v. Once the image is uploaded, adjust the options as follows:
a. Alignment: This is up to you. I don't think it matters where the original image starts. I have mine in the top left corner.
b. Tile: This must be set to Tile.
c. Scroll with page: I personally get a little dizzy when backgrounds scroll with the page so I unchecked this box. If you like the background to move up and down with your blog, check this box.
3. CREATE A HEADER, POST/SIDEBAR BACKGROUND AND FOOTER
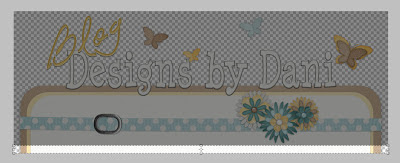
This type of design requires a specific type of header. Here is the header I made for this tutorial:
Notice that the header has the post/sidebar background attached to the bottom of it. This is necessary to give it the continuous look. Also notice that the background behind my title is transparent. It is not white, it is transparent.
Carolynn at Makin' Cute Blogs has posted a video tutorial on how to make a similar design. She offers a video tutorial using Pixlr. The last video shows how to make the post/sidebar background. Here is her tutorial:
For a more detailed header design, you can follow my instructions below. (I am creating this in Photoshop CS4 but you can adjust these for Photoshop Elements, Pixlr or whatever program you have.)
A. Open your design program of choice and open a new file with these dimensions:
The width and height can vary depending on your preference. The resolution should be 72 pixels/inch if you are using another designer's images for your header. (The larger the resolution, the more time it will take to load onto a computer.) The background MUST BE TRANSPARENT!
B. Create rounded rectangles that will act as the background to your post and sidebars. I like to do 3 rectangles but you can do it very simply and just do one.

Notice that the bottom of my rectangles are cut off. If your program allows, you can add shadows to your rounded rectangles. I also used matching digital scrapbook paper from the kit mentioned above to fill these rectangles. (I used layer masks to fill the shapes with the scrapbook paper. There are many tutorials on the web that can teach you how to do this.)
C. Next, add other design elements from your digital scrap kit or other images that you have permission to use. (Remember, you cannot use just any image from the web on your blog. Even if you find an image that does not have a watermark, you do not necessarily have permission to use that image. Be especially careful if you plan to use an image for your logo.)
To learn how to add elements to a design, read my tutorial on How to Make Your Own Blog Button.Once you are done with your design, save your image. You must save your image as a png file. If you don't save it in this format, it will not have a transparent background. To learn what a png file is, read my tutorial on the Difference Between a jpg and a png file.
Here is another look at the header I designed for this tutorial:

Notice that the colors I used in my text as well as in the butterflies are light enough to be seen over my dark blue background.
Once your header is complete and saved, go to your blog and upload your header from the Layoutpage. To do this, choose Layout from the drop-down menu on your Blogger Dashboard. Once you are on this page, find the white rectangle that says, "Header". Click "Edit" in this box. A small window will pop-up. Click "Browse" and find your header image on your computer. Then click "Instead of Title and Description". Un-check "Shrink to Fit". Click "Save" and your header will be uploaded to your blog. It will not be positioned correctly or have a transparent background, but that is ok for now.
D. Now we are going to use our header image to create our Post/Sidebar background.
In your graphics editing program, use the marquee tool to select a small sliver of your header as shown below:
I've used the crop tool here so that the small sliver can be seen better. If you use the crop tool to cut out this piece, be sure to save your file with a different file name so that your header is not lost!
Once you select this small sliver for your header, you will need to copy it (possibly "Copy Merged") and then paste it into a new file that is the same size. This image can be very short because it will be repeated vertically all the way down your blog. If you use shadows around the sides of your header, like I did, then you will have to save your post/sidebar background as a png file. If you did not, you can crop your image around the image so that none of the background shows and save it as a jpgfile.
Once your image is saved, you will need to upload it to a site like Photobucket. However, Photobucket recently changed things so that unless you have a Pro account, you can't upload images as wide as the ones we are making. If you do not have a Pro account, upload it to Blogger as shown below:
i. Create a new post.
ii. In this post, upload your background image as shown below:
Make sure the size is set to "Original size". Also, notice that you won't be able to see the whole image. That is ok.
iii. Next, click the button that says "HTML", right next to the "Compose" button.
iv. Copy the code right after
<img border="0" src="
then stop right before the closing quotation marks as shown below:
Do not include the quotation marks. This code is the direct link for the image. Notice that it is a web address (URL). I will be referring to it as the Post/Sidebar Direct Link.
v. Paste this code into a Word or Notepad file and label it the Post/Sidebar Direct Link. We will be using this later.
E. Alright, almost done with our images. Lastly we need to make our Footer image. If you have your header open, this part can be quite simple. Take your header image and remove or hide all of theelements except those rectangles that make up the post/sidebar background. (Make sure that you save this with a different file name so that you don't erase your header.) Then, flip your canvas or those images so that the rectangles are upside down as shown below:
I cropped this image slightly so that it was much shorter. If you would like a video tutorial for this, Carolynn at Makin' Cute Blogs has a tutorial below that shows you how to do this in Pixlr.
How to Design a Seamless Border Blog Header, Post Background Section and Footer using Pixlr.com
Once your footer is finished, you will need to save this as a png.
Finally, upload your footer to the web using a site like Photobucket or using Blogger. (Same tutorial as in Step D.)
4. CHANGE YOUR BLOG TEMPLATE TO THE WHITE SIMPLETEMPLATE
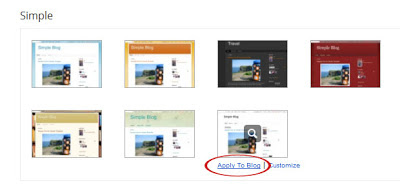
This tutorial is based off of the Blogger Simple template. There are 7 Simple Templates. Choose the last one, the one that is all white.
To choose this template, choose Template from the drop-down menu on your Blogger Dashboard. On this page you will several templates listed at the bottom. Find the last Simple template and place your cursor over the image. You should see the words "Apply to Blog / Customize". Click "Apply to Blog".
If you uploaded the background for your blog through the Blogger Template Designer, you can skip the next steps (A-D)
For those of you that did not upload your background through the Blogger Template Designer, you will need to make a few adjustments to the white Simple Template. On the Template page, click the orange button that says "Customize". This will take you to the Template Designer. Do the following to customize this template:
A. Click "Advanced" from the vertical list on the left side of the screen (in the gray area).
B. Click "Backgrounds" from the second vertical list.
C. Under the words "Outer Background" you will see a white box with a downward arrow. Click this arrow and then check the box next to "Transparent".
D. Do the same thing for the "Main Background".
The Outer Background is a rectangular area covering the entire top portion of your blog from left to right. If you don't remove this background then there will be a white rectangle sitting on top of your custom background. (This is not true if you upload your background through Blogger's Template Designer.)
The Main Background is the background of your posts and sidebars. If you want a custom post/sidebar background as shown in Step #3 you will need to remove this background. Otherwise you will see white on top of your custom post/sidebar background. (This is not true if you upload your background through Blogger's Template Designer.)
5. ALTER THE HTML/CSS
Now it is time to add to and alter the HTML/CSS of your template to fit each of these design elements.
A. First, we are going to add some CSS:
i. Go to the Template page and click "Customize" so that you are in the Template Designer.
ii. Click "Advanced" from the menu on the left and then scroll down in the second menu until you see "Add CSS".
iii. Add the following code into the box:
.header {
width: 1040px;
}
.content-inner {
background: url('POST/SIDEBAR BACKGROUND DIRECT LINK HERE') repeat-y;
background-color:transparent;
background-position: 7px;
padding-bottom:10px;
padding-left:40px;
padding-right:40px;
padding-top:10px;
width: 960px;
}
.footer-inner {
background: url('POST/SIDEBAR BACKGROUND DIRECT LINK HERE') repeat-y;
background-position: 7px bottom;
width: 960px;
}
.footer-outer {
background: url('FOOTER IMAGE DIRECT LINK HERE');
background-repeat: no-repeat;
background-position: 0px bottom;
border: 0px;
padding-bottom:160px;
width: 1040px;
}
B. Now we are going to alter the HTML.
i. Go to the Template page and click "Edit HTML". (You may want to backup your blog again before editing the HTML, just to be safe.)
ii. The first change is to move the HTML for the Header outside of the "content-inner" section of the blog. This will set the header above the main portion of the blog and allow it to have a transparent background. To do this:
Find the HTML that starts with <header> and ends with </header>. (Use Ctrl-F to find this section.)
Cut this section and move it from here (right below <div class='content-inner'>:
To right below <div class='content-outer'> (Use Ctrl-F to find this section.):
iii. Now we are going to move the Footer section outside of the main body of the blog, just like we did the Header.
Find the HTML that starts with <footer> and ends with </footer>. (Use Ctrl-F to find this section.)
Cut this section and move it from here
To right below
<!--content-->
</div>
This placed the footer section outside of the main section and allowed it to have a transparent background.
6. MAKE A FEW ADJUSTMENTS
After entering the code, you may find that your design elements do not line up as well as you would like. For example, when I first entered my code (which I found from Makin' Cute Blogs), the header, the "content-inner", "footer-inner" and "footer-outer were not lined up as shown below:
To help you know how to make your own adjustments, I will go through the CSS code from the beginning of Step 5 and explain what the different parts mean.
.header {
width: 1040px;
}
Alter this width to match the width of your header image.
.content-inner {
background: url('POST/SIDEBAR BACKGROUND DIRECT LINK HERE') repeat-y;
The DIRECT LINK is the URL/code that you copied from Photobucket or Blogger in Step 3. The code "repeat-y", repeats the post/sidebar background up and down (along the y-axis). If you forget this part it may still repeat, but it may also repeat left to right (along the x-axis).
background-color:transparent;
background-position: 7px;
If the post/sidebar background does not line up with your header, adjust the background-position. To move it to the left, choose numbers smaller than 7. You can enter 0 and negative numbers if you need to move it that far to the left. To move this background to the right, choose numbers larger than 7.
padding-bottom:10px;
The padding-bottom creates more blank space below your posts/sidebar and the footer of your blog. The post/sidebar background will fill this space. For more space, increase this number. For less space, decrease this number.
padding-left:40px;
The padding-left is important if you find that your text is too close to the left border of your post/sidebar background. Increase this number to move your text more to the right. Decrease it to move it to the left.
padding-right:40px;
You can play around with the padding-right to see what it does. It should adjust the padding on the right, but I found that increasing this number did not make any change for me. Decreasing this number will cause your post/sidebar background to be cut-off on the right.
padding-top:10px;
The padding-top will increase or decrease the space between your header and your posts/sidebar. The post/sidebar background will fill this space. If you have a navigation bar using blogger's Tabs, this space will be above that navigation bar. To increase the space, increase this number. To decrease the space, decrease this number.
width: 960px;
}
The width of the post/sidebar background should be about 80 pixels less than the width of your header but if it does not look right, you can adjust this up or down until it looks right.
.footer-inner {
background: url('POST/SIDEBAR BACKGROUND DIRECT LINK HERE') repeat-y;
Enter the same DIRECT LINK that you entered for "content-inner". The code "repeat-y", repeats the post/sidebar background up and down (along the y-axis). If you forget this part it may still repeat, but it may also repeat left to right (along the x-axis).
background-position: 7px bottom;
This background position places the background at the bottom of the "footer-inner" section of your blog. The "footer-inner" is the section of your footer where you can add text or gadgets.
The 7px places the background 7pixels to the right of this section's left border. If you need to adjust this, smaller numbers will move it to the left and larger numbers will move it to the right.
width: 960px;
}
This is the same as the width for the "content-inner".
.footer-outer {
The "footer-outer" is just the image that you created for the footer. There are no gadgets or text on that sit on top of this image.
background: url('FOOTER IMAGE DIRECT LINK HERE');
The footer DIRECT LINK is the URL or Direct Link that you copied from Photobucket or Blogger in step 3.
background-repeat: no-repeat;
We don't want this footer image to repeat, so leave this as is.
background-position: 0px bottom;
This background position places the footer background at the bottom of the "footer-outer" section and closer to the bottom of the browser window. You can remove it or choose "center". Do not use "top" or it may overlap the image above it.
The 0px places the background right on the left border of the "footer-outer" section. If you need to adjust this, negative numbers will move it to the left and positive numbers will move it to the right.
border: 0px;
padding-bottom:160px;
If your "footer-inner" and "footer-outer sections are overlapping, you need to increase the "padding-bottom". If they are too far apart, you need to decrease this number.
width: 1040px;
}
This width should match the width of your header image.
Every blog is different so I recommend previewing your changes in the Blogger Template Designer before you save your changes and click "Apply to Blog".
If your blog is looking good, it might be a good idea to backup your template again. You can save it under a new name to differentiate between your original template and this new updated one.
7. ADD EXTRA DESIGNS
The final step in creating your own custom template is adding extra design features such as a post icon, post divider, sidebar titles, blog button etc. There are several tutorials for these shown below:
Also, be sure to customize the fonts and colors on your blog in the Blogger Template Designer. Go to Advanced and then click on any of the options and use the fonts and colors that look best on your blog!
Here is a final view of my custom template:
Thanks for using this tutorial. Leave a comment with a link to your blog. I'd love to see your custom designs!